Acura Rlx Brake Pads (2014-2020) - Parts, Prices & Buying Guide
Browse 24 brake pads listings for your Acura Rlx with live marketplace pricing.
Found 24 listings for "acura rlx brake pads"

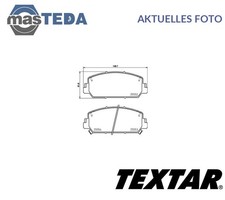
BREMSBELÄGE ACURA T. MDX/TLX 3.5 13-

SATZ BREMSBELÄGE BREMSKLÖTZE HINTEN TEXTAR 2238901 A FÜR ACURA TLX,RLX,MDX

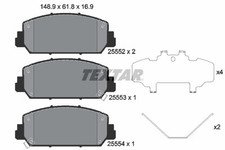
SATZ BREMSBELÄGE BREMSKLÖTZE VORNE TEXTAR 2555201 A FÜR ACURA RDX,RLX 3.5L,3L

SATZ BREMSBELÄGE BREMSKLÖTZE HINTEN TEXTAR 2238901 A NEU OE QUALITÄT

HELLA Bremsbeläge Satz Vorne Bremsklötze für HONDA PILOT YF3 YF4 8DB 355 020-211

TEXTAR 2560801 Bremsbelagsatz, Scheibenbremse für ACURA,HONDA
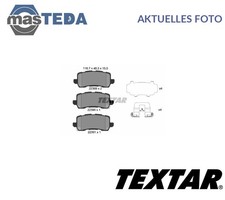
2238901 SATZ BREMSBELÄGE BREMSKLÖTZE HINTEN TEXTAR NEU OE QUALITÄT
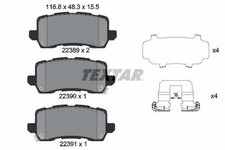
TEXTAR Bremsbeläge Satz Hinten für HONDA HR-V (RU) für ACURA MDX (YD3) 2238901
TEXTAR 2555201 Bremsbelagsatz, Scheibenbremse für ACURA,HONDA (DONGFENG)
SATZ BREMSBELÄGE BREMSKLÖTZE VORNE TEXTAR 2555201 A NEU OE QUALITÄT
2555201 SATZ BREMSBELÄGE BREMSKLÖTZE VORNE TEXTAR NEU OE QUALITÄT

BREMSBELAGSATZ SCHEIBENBREMSE 2238901 FÜR ACURA HONDA K24W7 2.4L 4cyl TLX 3.5L

TEXTAR 2238901 Brake Pad Set, disc brake for ACURA,ACURA (GAC),HONDA
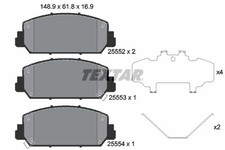
TEXTAR 2555201 Brake Pad Set, disc brake for ACURA,HONDA (DONGFENG)

TEXTAR 2560801 Brake Pad Set, disc brake for ACURA,HONDA

TEXTAR 2238901 Bremsbelagsatz, Scheibenbremse Für Acura, Acura (GAC), Honda

MAXGEAR 19-3951 Bremsbelagsatz, Scheibenbremse für Acura, Honda

BREMSBELAGSATZ SCHEIBENBREMSE 2560801 FÜR ACURA HONDA J37A5/J37A1/J37A2 3.7L MDX

MAXGEAR 19-3951 Bremsbelagsatz, Scheibenbremse Für ACURA, HONDA
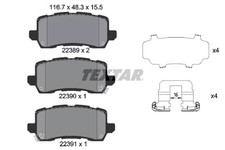
Bremsbelagsatz hinten TEXTAR 2238901 HONDA HR-V 1.5 (RU1)
About Acura Rlx Brake Pads Parts
Looking for Acura Rlx brake pads? Find high-quality brake pads designed specifically for your vehicle. Whether you need ceramic, semi-metallic, or organic brake pads, we offer options from trusted manufacturers. Regular brake pad replacement is essential for safe driving and optimal braking performance.
Why Shop Brake Pads for Acura Rlx?
- Genuine OEM and high-quality aftermarket options available
- Competitive pricing from verified eBay sellers
- Fast shipping options with buyer protection
- Easy returns and seller ratings for peace of mind
Technical Information
Your brake pads work with the rotors and calipers to provide consistent, safe braking performance.
Available Types
- Ceramic
- Semi-metallic
- Organic
- Carbon-fiber
Key Benefits
- Quieter operation
- Less brake dust
- Better heat dissipation
- Longer rotor life
Warning Signs to Watch For
- Squealing noise when braking
- Grinding sounds
- Longer stopping distances
- Brake pedal vibration
- Warning light on dashboard
Recommended Replacement Interval
30,000-70,000 miles depending on driving conditions
Installation Information
This is a good DIY project for most skill levels.
Installation time may vary for Acura Rlx based on engine bay layout and accessibility.
Frequently Asked Questions
How do I find the right brake pads for my Acura Rlx?
Verify compatibility using your Acura Rlx's VIN number, production year (2014-2020), and engine code. Check seller compatibility charts and cross-reference OEM part numbers when possible.
How often should I replace brake pads on my Acura Rlx?
General guideline: 30,000-70,000 miles depending on driving conditions. However, driving conditions (city vs highway, climate, towing) affect replacement frequency. Inspect regularly and replace when warning signs appear.
Should I use OEM or aftermarket brake pads for my Acura Rlx?
OEM parts guarantee exact Acura specifications and fitment. Quality aftermarket brands often meet or exceed OEM standards at lower prices. For warranty vehicles, check if aftermarket parts affect coverage.
What are signs that my Acura Rlx needs new brake pads?
Common warning signs include: Squealing noise when braking, Grinding sounds, Longer stopping distances, Brake pedal vibration, Warning light on dashboard. If you notice any of these symptoms, inspect or replace the brake pads promptly to prevent further damage.
Can I install brake pads on my Acura Rlx myself?
Yes, this is typically a moderate DIY job taking 1-2 hours. Always consult your owner's manual and follow proper safety procedures.